Last weekend we went to Las Casas Filipinas de Acuzar with famed photographer Shaira Luna and the ASUS Team for a unique media junket. Armed with the ASUS ZenFone Zoom, we spent the entire day exploiting its optical zoom lens to do a unique photo shoot done entirely with a smartphone.
We learned a lot of things in the process – here are 7 of the best. Aside from the watermarks, all of the photos here are taken straight off the camera with little to no post processing. If anything, most were re-sized for ease of upload.
BUY: ASUS ZenFone Zoom ZX551ML (Php 22,399) on Lazada
1. Auto mode works most of the time

Sometimes you just need to be able to capture the moment instantly. The camera defaults to Auto mode, and for us it takes decent photos most of the time: good auto white balance, the laser guided auto focus is snappy, though overall brightness may need some tweaking.
Overall auto is a good way to go if you do not have time to fiddle with the camera settings – just fire and forget!
2. The dedicated camera button is super handy

Holding dedicated camera button directly fires the camera application, allowing you to bypass the lock screen. Even if you do not have a lock screen this saves at least two gestures from a suspended phone (i.e. you have the screen turned off).
If that’s not enough, you can even take a picture directly from suspension by changing the physical button behavior to “Launch and capture” under camera settings.
The dedicated camera button is super handy and lets you take pictures (and videos) in a snap – literally!
3. Control exposure by long-pressing the desired focus point
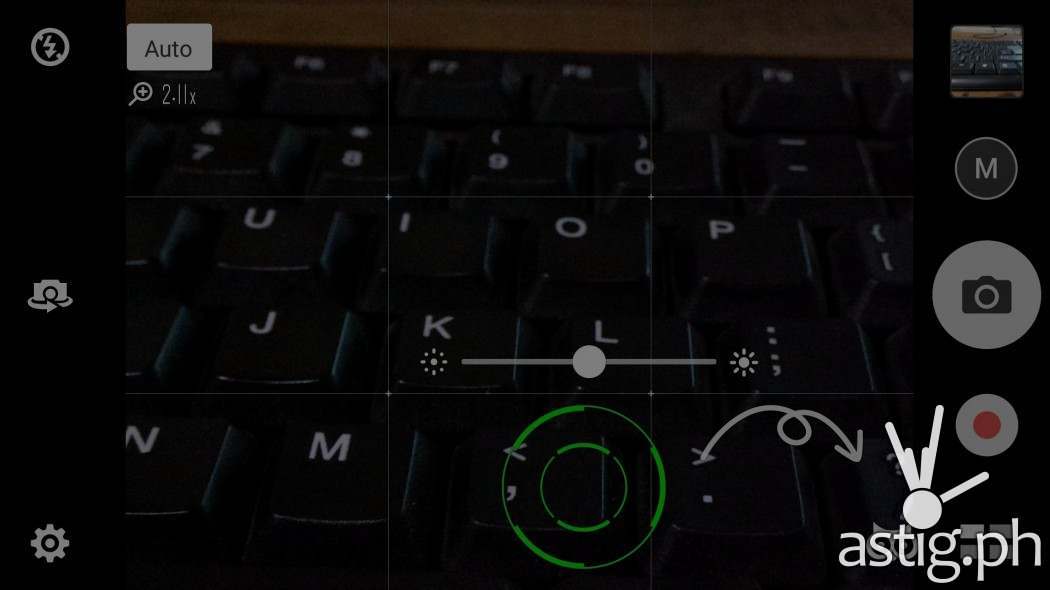
Sometimes you may want to lock focus and exposure to a specific area in the photo. You can lock the lighting and exposure to a specific area in the scene by holding it for a split second.
A green “crosshair” will appear, indicating the lock. You can then slide the exposure meter left or right to darken or lighten the scene, respectively. This option is only available on Auto mode.
4. For better looking photos, tweak the default picture settings
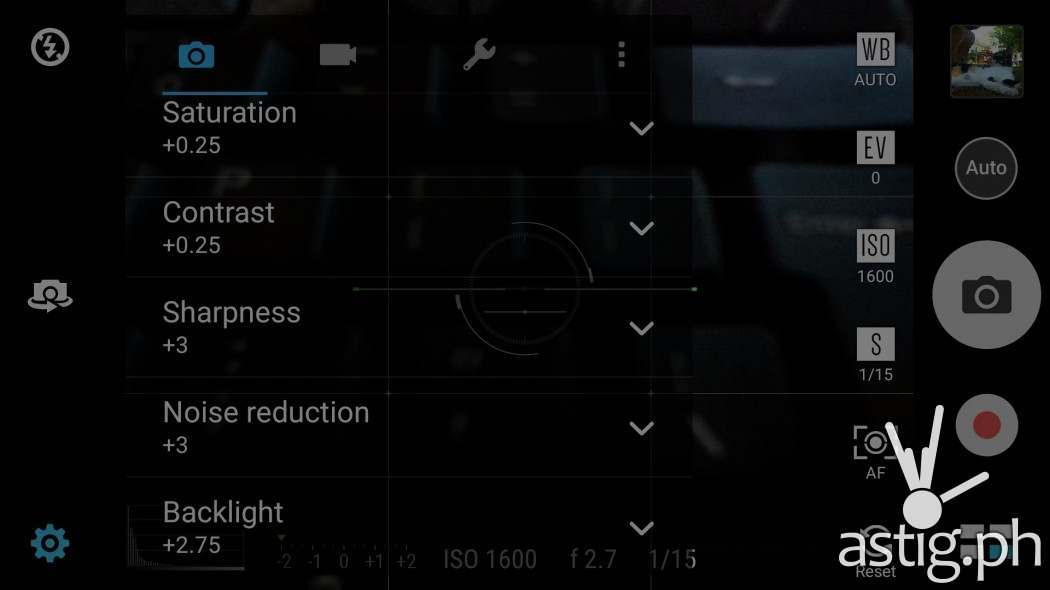
If you’re wondering why your photos look dull on your desktop screens, try tweaking the default picture settings such as Saturation, Contrast, Backlight, etc.
Note that these settings are only available in Manual mode, so that’s one more reason to go Manual!
5. No RAW support, but …
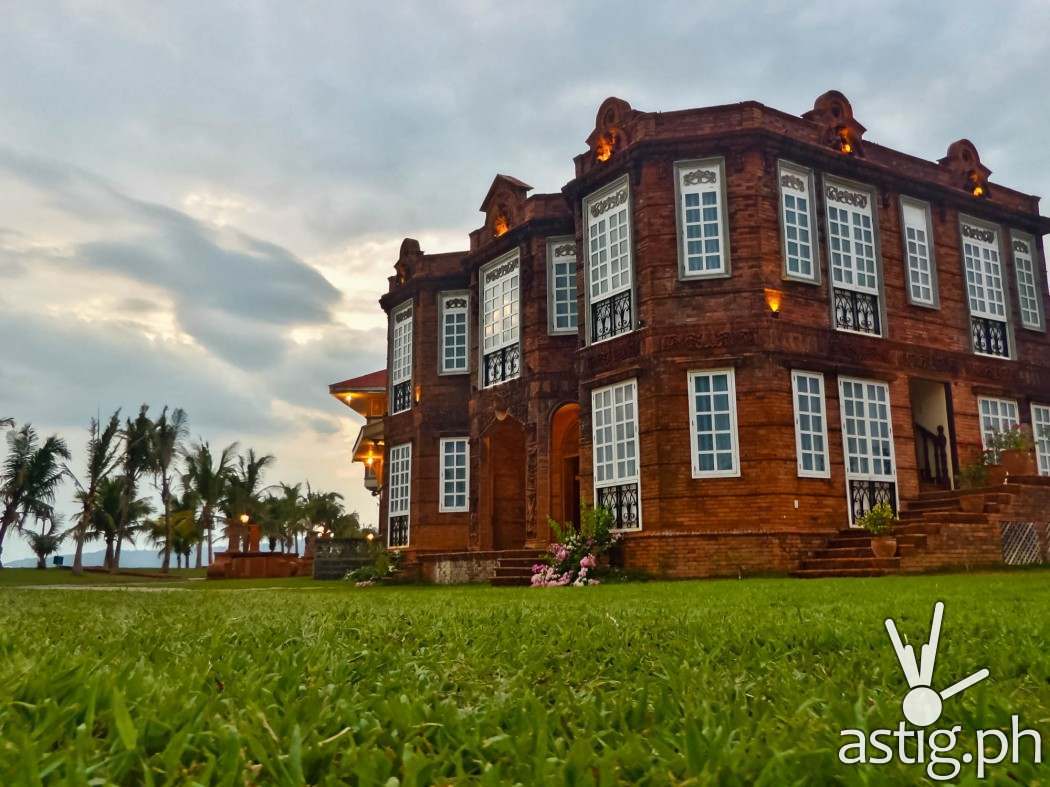
Any photographer worth his salt uses RAW format to capture photos, and with the Lollipop update Google, made RAW support easier via the Camera2 API. Several smartphones have implemented this feature, unfortunately ASUS ZenFone Zoom is not one of them.
However, because the Zoom takes such good quality photos, that might not really be necessary. Sure you may not be able to really save those badly exposed photos, but if you need RAW that badly then you should probably bring a DSLR with you.
6. Where’s the bokeh?

Although you can take bokeh shots with a fixed-zoom camera, the Zoom lens makes it a lot easier to take bokeh-licious shots.
All you have to do is zoom into around 1.5-2x and focus on your subject. This give you a shallower depth of field, blurring the background, resulting in a nice bokeh photo.
7. You can get spoiled by the optical Zoom lens
Some of you might be thinking: who needs in-camera zoom if you can just move forward or back in order to get a similar effect?
Well, there are plenty of things you can do with a zoom lens that you cannot do with a normal fixed lens such as:
Zooming in to eliminate shadows
Sometimes, shadows can get in the way of a good shot, like in the picture below. Both shots were taken in manual mode at different focal lengths.

By moving back and then zooming in, we are able to eliminate shadows and still capture the same area while retaining picture quality.

Tight shot on a subject that is blocked by an obstacle
Sometimes your subject is blocked by an obstacle and you are left with two choices: shoot the scene as is and then crop it in post, or zoom in and take the shot that you want.
No a problem for the Zoom – just frame and snap!

Capturing wildlife
Wildlife can be difficult to capture, especially if they know they are being watched – they will often try to run or fly away. Optical eliminates the need to move too close to get a good shot.

You still need persistence to get the perfect shot though, so keep snapping!

Sometimes it is faster (or more convenient) to zoom than to walk
If the sun is too hot or it’s raining, you can stay in a shady area and just zoom in to capture your subject. Without zooming capabilities, you really need to move closer to the subject, which means getting wet or being fried by the sun.
Optical zoom also comes in handy when taking quick photos of fast-moving objects – you might not have the time to move close enough but you can always count on optical zoom to do the close-ups for you.

Stealth. ‘Nuff said.
We already said you can capture wildlife easily with the zoom lens, but that applies to people too. Welcome to the world of stealth photography, my friend.

Now let’s zoom in to 3X – notice picture quality stays more or less the same – nice and detailed.

The below photo was captured at 12x digital zoom. Notice the loss in quality?

Here’s a video demonstration of the optical zoom lens in action:
Because optical zoom magnifies the actual image seen by the sensor, this preserves detail and eliminates grain that you normally get from digitally blown-up photos. It’s fantastic and you can get spoiled by it. Beware: once you get a taste of optical zoom, you might not want to go back … ever.
Get a chance to win an ASUS ZenFone Zoom by liking and sharing this photo from ASUS Philippines’ Facebook page!

