In times like these when COVID-19 is affecting all of us greatly in every way, it’s more important than ever to not only be safe from disease and healthy, but also to be resourceful and practical.
With the right tools and materials, it’s very easy to make your own basic protective gear. Did you know that with some spare cloth, a printer, and a sewing machine, you can sew your own facemask? Now there’s no need to worry about disposable facemasks—you can quickly craft your own for light everyday use and supplies of surgical masks can go to health workers and frontliners who need them more.
Materials
Here’s what you’ll need:
- Outer fabric (20cm x 80cm)
- Inner fabric (20cm x 80cm)
- Band (2m)
- Printer
- Sewing machine/sewing tools
Note:
- The above measurements are good for three masks.
- Soft-textured material, such as gauze, is preferable.
- You can add your own embroidery or lace.
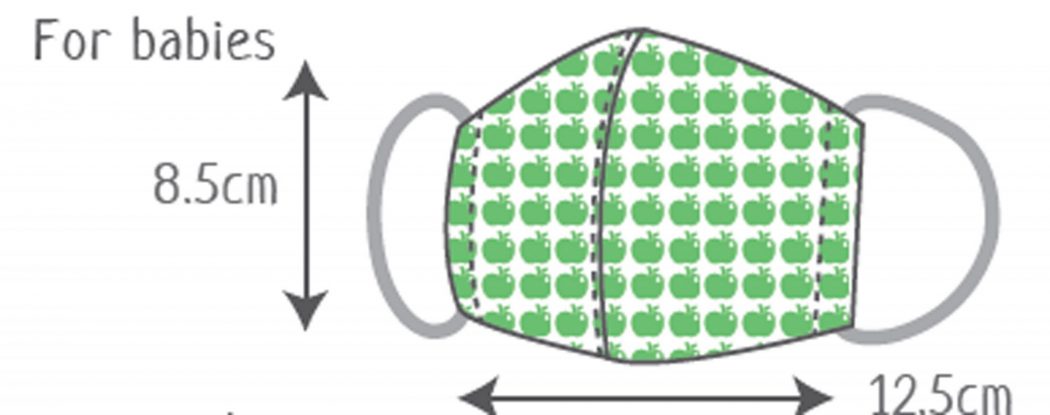
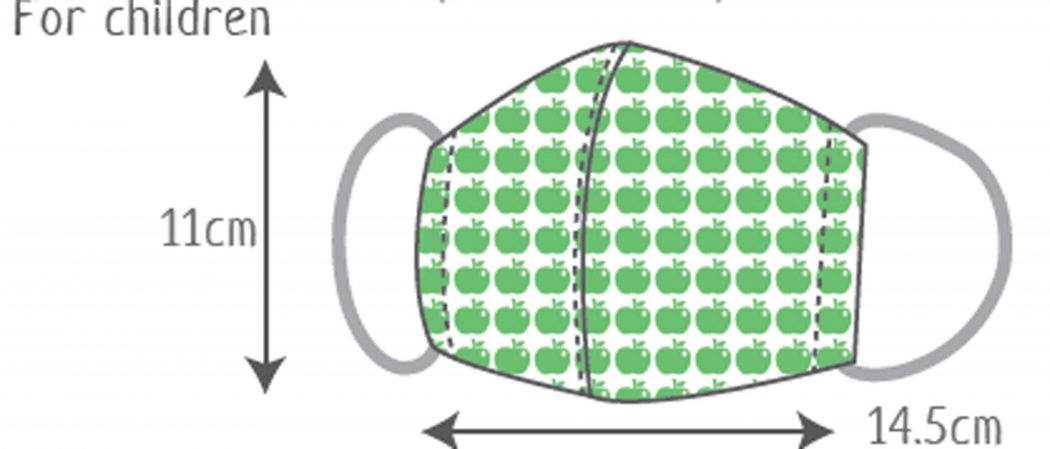
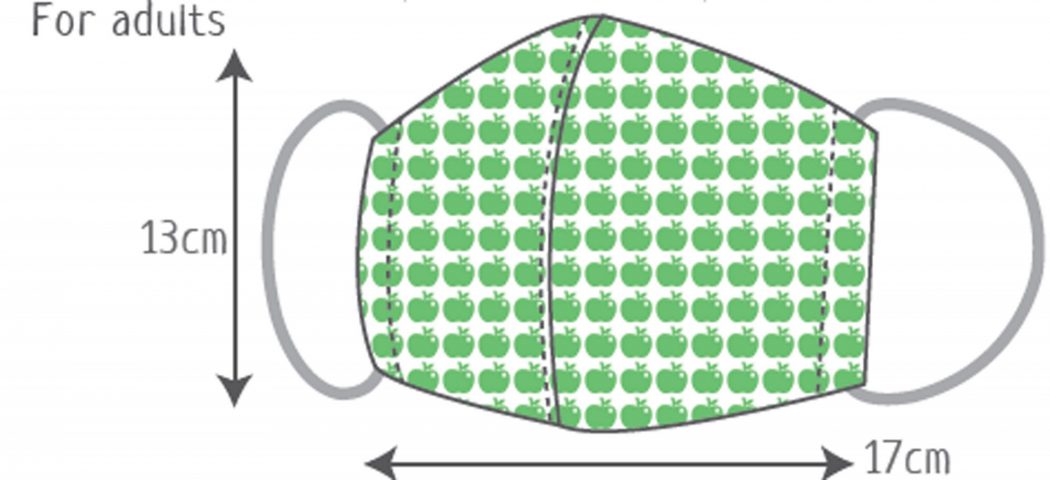
Size chart
| Size | Finished size | Length of ear band |
| For babies (9 months – 3 years) | 8.5cm x 12.5cm | 29cm x 2 pieces |
| For children (5 – 9 years) | 11cm x 14.5cm | 31cm x 2 pieces |
| For adults | 13cm x 17cm | 35cm x 2 pieces |
Instructions
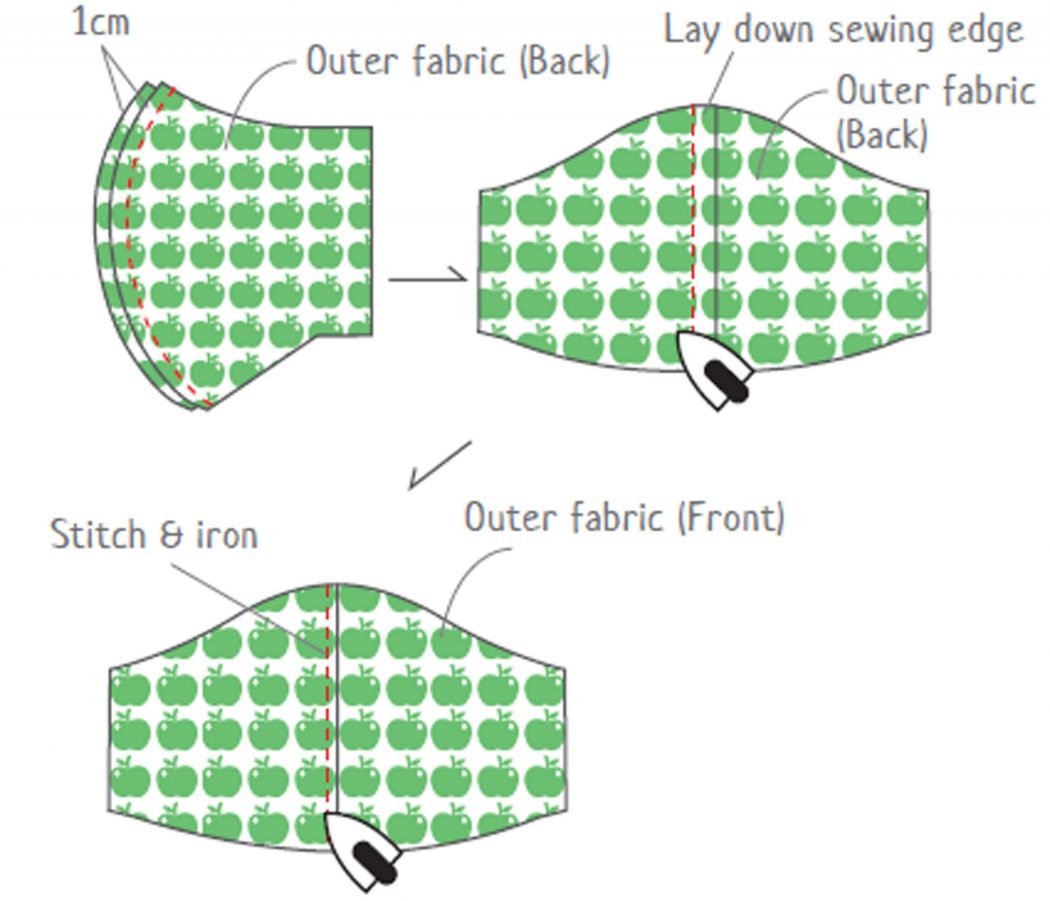
1. Sew the outer fabric together.
Cut two pieces of the outer fabric according to the attached pattern, which you can print for accuracy.
Place the pieces together right-side in, then sew them with 1cm seam allowance. Press-iron edges and topstitch. Don’t forget to reinforce the stitches at the start and end.
2. Do the same for the inner fabric.
You can decorate the mask at this step.
3. Sew the inner and the outer fabric together.
Place the inner and outer fabric together right-side in, then sew the top and bottom. Press-iron edges and topstitch.
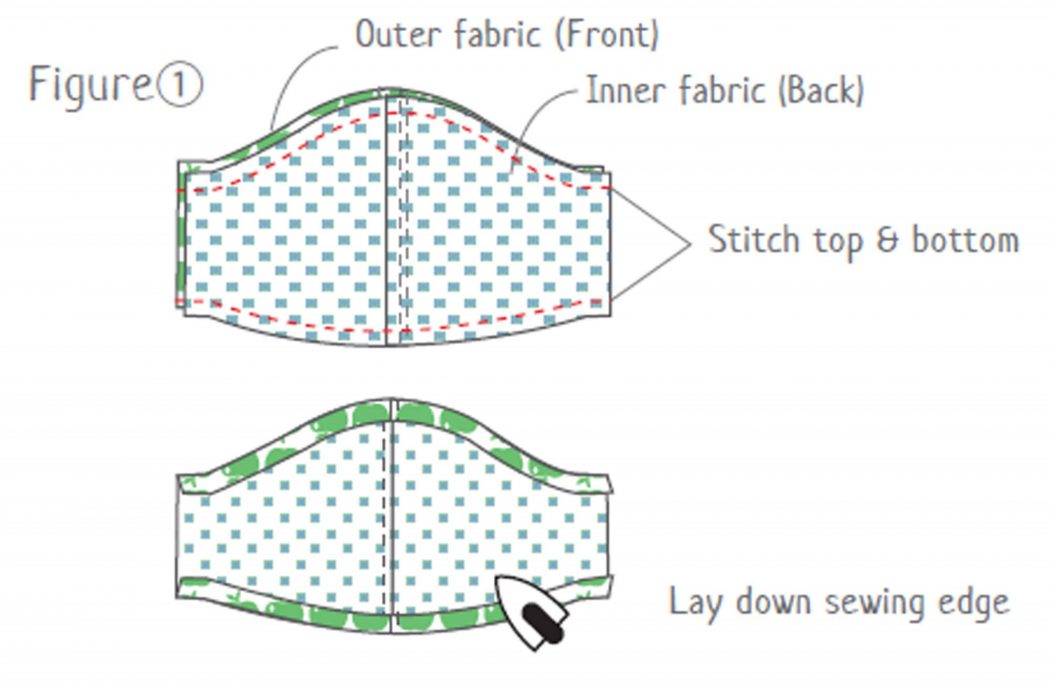
Then turn the inner fabrics right-side out. Press-iron and topstitch.
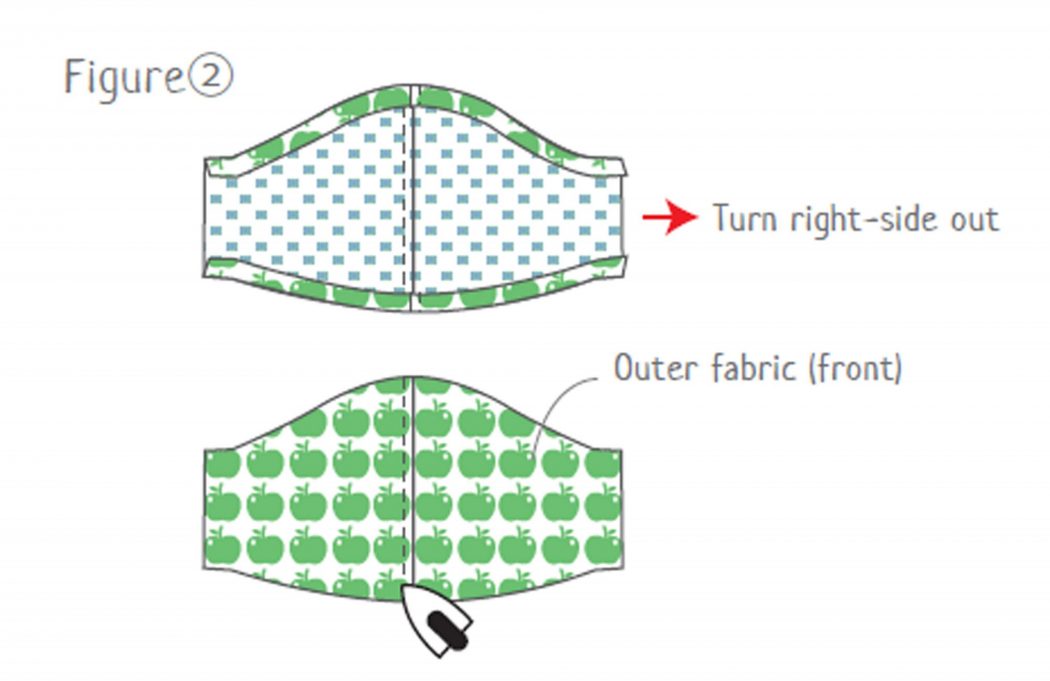
4. Make the elastic band.
Sew the inner mask layer. Fold one edge three times and stitch. Do the same for the other side.
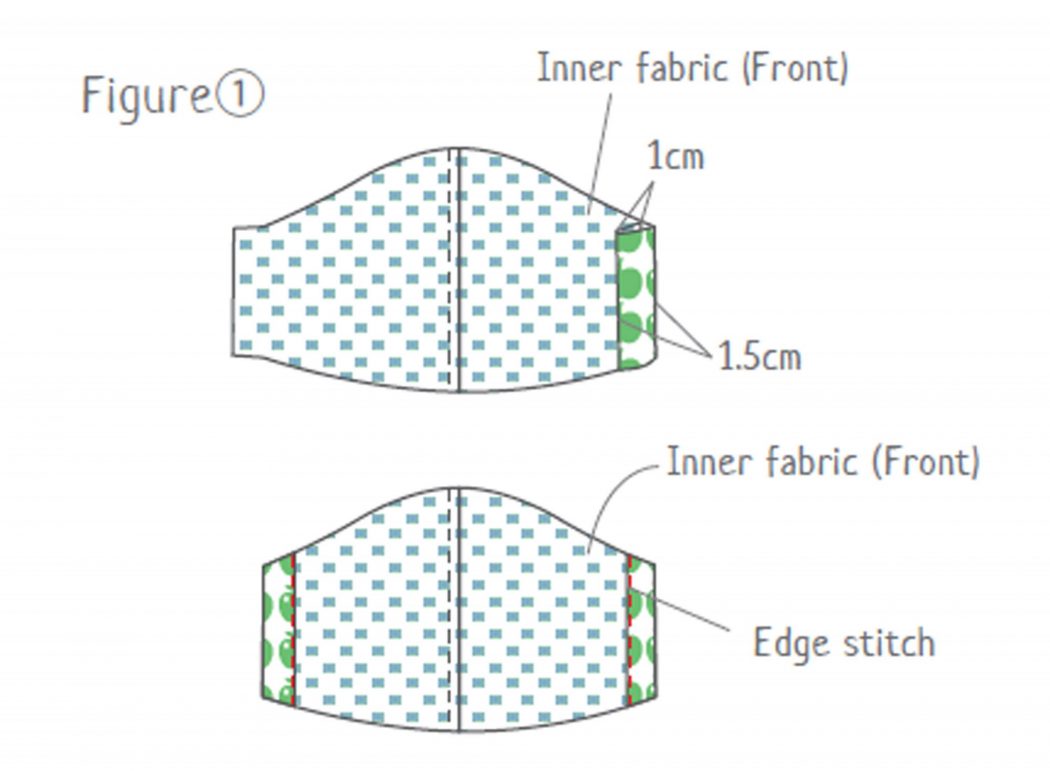
Assemble the elastic band by cutting it according to the measurements in the size chart plus 3cm seam allowance. (You’re free to adjust the measurements as needed.) Insert it through the edges of the mask and tie a knot to secure them.
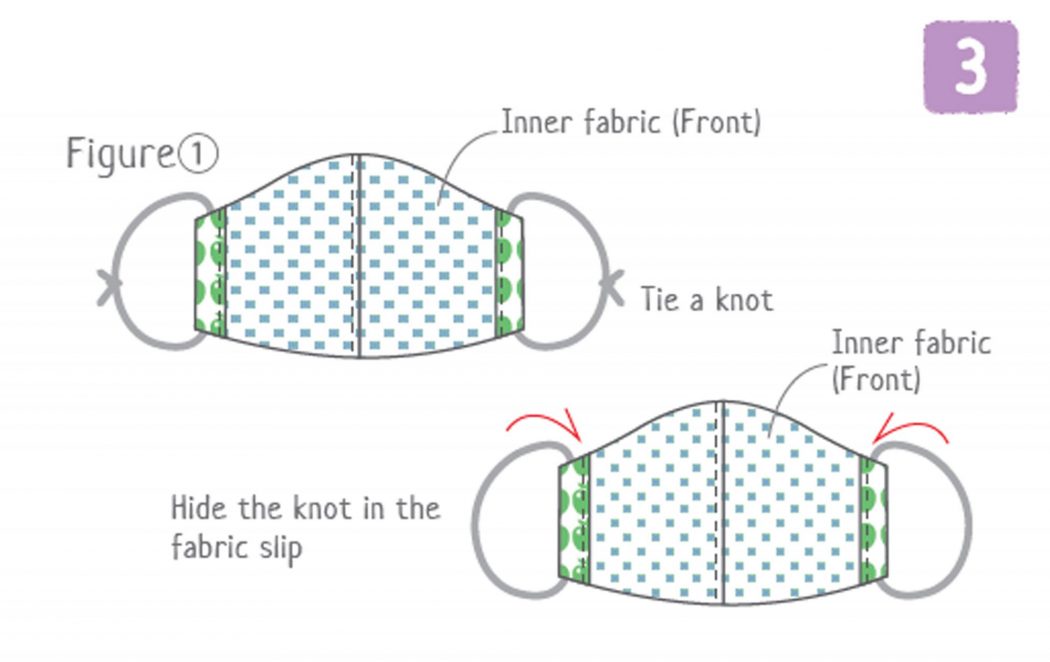
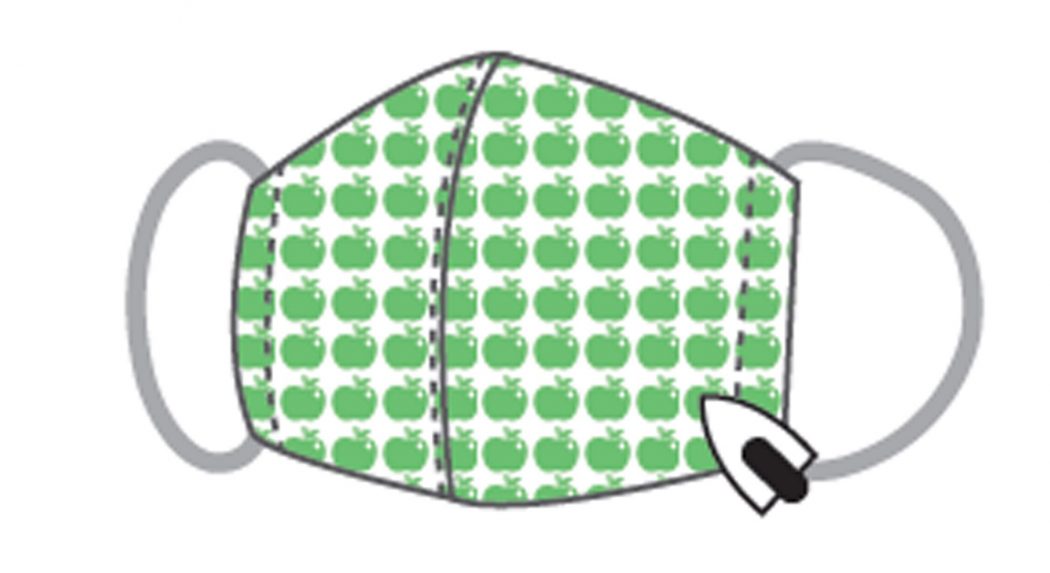
5. Iron the mask to finish it!
You can also watch this video to see how everything is done:
You can download printable copies of the patterns and instructions at http://bit.ly/BrotherDIYFacemask.
Other notes:
- You can use any pattern and design you want!
- For better results, tighter stitches, and a more durable mask, you can machine-stitch it with reliable tools such as Brother Sewing Machines.
Brother Philippines stands with the nation in its fight against COVID-19, and supports all efforts to combat the spread of the virus and heal the country. For more information, visit https://www.facebook.com/BROTHERatyourside


